|
System of Rice Intensification (SRI) Cultivation
Components of System of Rice Intensification (SRI) Cultivation
Nursery Management

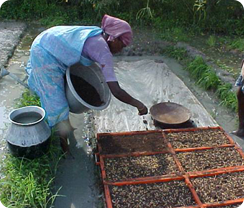
Soil Mixture |
Blending Soil Mixture |

Wooden Frame |

Filling the Wooden Frame |
Sowing Sprouted Seeds |

Lifting Seedlings |

Lifting Seedling Mat |
Mainfield

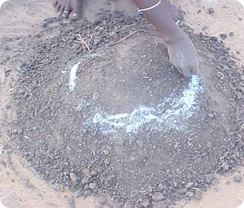
Square Planting |

Transplanted Young Seedling |
Weeding

Moving Weeder from 10-15th day onwards |

Moving Weeder |

Weeder moved in both direction |
Nutrient Management

LCC based N Management |

Grown up System of Rice Intensification (SRI) field |
System of Rice Intensification (SRI) Cultivation in Tamil Nadu
1. Season
- Dry season with assured irrigation is more suitable.
- Difficulty in crop establishment may be seen in areas with heavy downpour
(NE Monsoon periods of Tamil Nadu)
2. Varieties
- Hybrids and varieties with heavy tillering
3. Nursery
3.1. Seed rate
- 7- 8 kg for single seedling per hill
- 12 -15 kg/ha for two seedlings per hill wherever difficulty in establishment of rice is seen
Preparation of nursery area:
Prepare 100 m2 nurseries to plant 1 ha. Select a levelled area near the water source. Spread a plastic sheet or used polythene gunny bags on the shallow raised bed to prevent roots growing deep into soil.
Preparation of soil mixture: Four (4) m3 of soil mix is needed for each 100 m2 of nursery. Mix 70% soil + 20% well-decomposed pressmud / bio-gas slurry / FYM + 10% rice hull. Incorporate in the soil mixture 1.5 kg of powdered di -ammonium phosphate or 2 kg 17-17-17 NPK fertilizer.
Soil Mixture |
|
Blending Soil Mixture
Filling in soil mixture: Place a wooden frame of 0.5 m long, 1 m wide and 4 cm deep divided into 4 equal segments on the plastic sheet or banana leaves. Fill the frame almost to the top with the soil mixture.
Pre-germinating the seeds 2 days before sowing: Soak the seeds for 24 h, drain and incubate the soaked seeds for 24 h, sow when the seeds sprout and radical (seed root) grows to 2-3 mm long.
Soil application of biofertilizers :Application of Azospirillum @ 2 kg and mycorrhizal fungi @ 5 kg for 100 m2 nursery area
Sowing:
- Sow the pre-germinated seeds weighing 90 -100 g / m-2 (100g dry seed may weigh 130g after sprouting) uniformly
- Cover them with dry soil to a thickness of 5mm.
- Sprinkle water immediately using rose can to soak the bed and remove the wooden frame
- And continue the process until the required area is completed.
|

Sowing Sprouted Seeds |
Watering:
- Water the nursery with rose can as and when needed
(twice or thrice a day) to keep the soil moist.
- Protect the nursery from heavy rains for the first 5 DAS. At 6 DAS, maintain thin film of water all around the seedling mats.
- Drain the water 2 days before removing the seedling mats for transplanting.
|

Watering with Rose Can |
Spraying fertilizer solution (optional): If seedling growth is slow, sprinkle 0.5% urea + 0.5% zinc sulfate solution at 8-10 DAS.

Mat Nursery
Lifting seedling mats: Seedlings reach sufficient height for planting at 15 days. Lift the seedling mats and transport them to main field.
Lifting Seedlings |
Lifting Seedling Mats |

|
For elite seedling production under modified mat nursery : seed fortification with 1.0% KCl mixed with native soil and powdered DAP @ 2.0 kg per cent along with Pseudomonas 240 g/ cent followed by drenching with 0.5 % urea solution on 9 DAS
4. Main field preparation
- Puddled lowland prepared as described in transplanted section
- Perfect leveling is a pre-requisite for the water management proposed hereunder
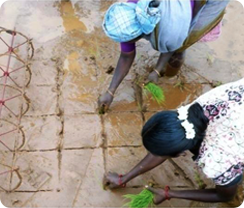
5. Transplanting
- 1-2 seedlings of 14-15 days old
- Square planting of 25 x 25 cm (10 x 10 inch)
- Fill up the gaps between 7th and 10th DAT.
- Transplant within 30 minutes of pulling out of seedlings.
- There may be difficulty in crop establishment in areas with heavy downpour (North East Monsoon periods of Tamil Nadu)

Square planting with single seedling
|

Transplanted Young Seedling |
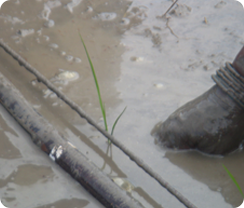
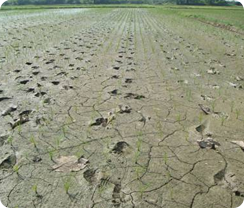
6. Irrigation management
- Irrigation only to moist the soil in the early period of 10 days
- Restoring irrigation to a maximum depth of 2.5cm after development of hairline cracks in the soil until panicle initiation
- Increasing irrigation depth to 5.0cm after PI one day after disappearance of ponded water
|
 |
 |
| |
Alternate wetting and drying (irrigate until hairline crack develop) |
7. Weed management
- Using rotary weeder / Cono weeder / power operated two row weeder
- Moving the weeder with forward and backward motion to bury the weeds and as well to aerate the soil at 7-10 days interval from 10-15 days after planting on either direction of the rows and column.
- Manual weeding is also essential to remove the weeds closer to rice root zone.

Using rotary weeder / Cono weeder |

|

Weeder should be moved in both directions |
8. Nutrient managements
- As per transplanted rice.
- Use of LCC has more advantage in N management.
- Green manure and farm yard manure application will enhance the growth and yield of rice in this system approach.
- Under sodic soils, during rotary weeding, apply Azophosmet @ 2.2 kg/ha and PPFM as foliar spray @ 500 ml/ha.
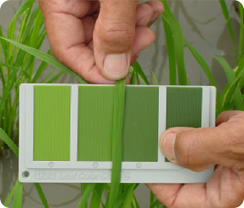
N management through LCC
- Time of application is decided by LCC score
- Take observations from 14 DAT in transplanted rice or 21 DAS in direct seeded rice.
- Repeat the observations at weekly intervals up to heading
- Observe the leaf colour in the fully opened third leaf from the top as index leaf.
- Match the leaf color with the colours in the chart during morning hours (8-10 am).
- Take observation in 10 places.
- LCC critical value is 3.0 in low N response cultures like White Ponni and 4.0 in other cultivars and hybrids
- When 6/10 observations show less than the critical colour value, N can be applied @ 35kg N/ha in dry season and 30kg N/ha in wet season per application per ha.
- Green manure and farm yard manure application will enhance the growth and yield of rice in this system approach.
|

Leaf Color Chart based N Management |
Other package of practices as recommended to transplanted rice
Source: http://www.pustaka-deptan.go.id/rkb/knowledgeBank
Updated on: Jan 2014 |